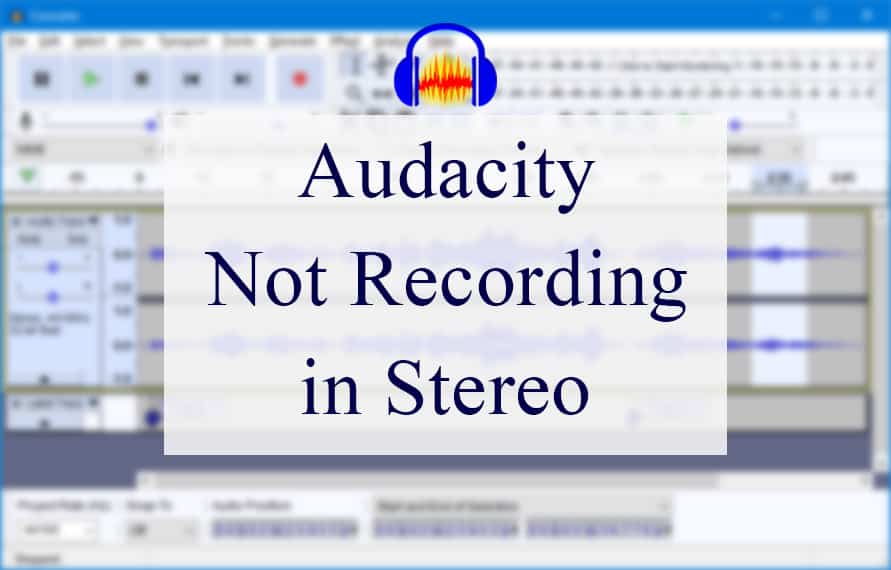
Audacity is a leading software that helps users edit their music tracks. It’s a cross-platform with easy-to-use features and multi-track audio editing support. It works on Linux, Mac, and Windows operating systems and is used for recording tracks within the software.
However, there are instances when Audacity stops recording in the stereo, but it has various easy solutions that you can try out!
How to Solve Audacity Not Recording in Stereo
- Change Preferences
Audacity has the default settings for recording in stereo mode, but this setting can be changed. This is why you must check the preferences and ensure that they are in the correct order. To change the preferences, follow these steps;
- Open Audacity software on your computer system
- Click on the device toolbar and tap on the playback and recording devices option
- Choose the “2 recording channels,” and it will start working with the stereo
- Check Input
The channels and input devices must be correctly set for the Audacity to record in stereo. For instance, check the channels and make sure you are playing the tracks in the stereo mode.
To select the correct channel, open the device toolbar in the Audacity software and select the 2(stereo) option. Once the channel input is fixed, you will be able to record in stereo.
- Check Configuration
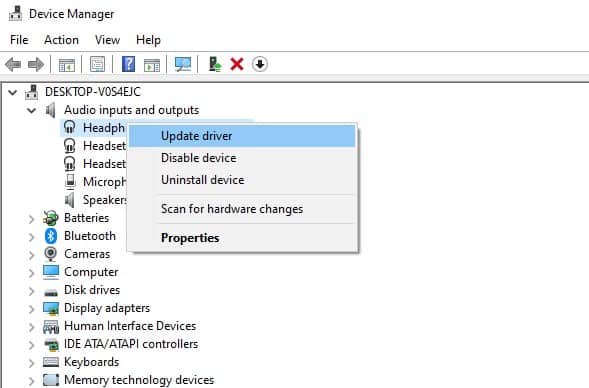
The first step is to check the drivers because they must be configured properly to support Audacity’s functionality. The audio drivers on your PC must be fully installed and updated to the latest versions. The audio drivers can be updated from the device manager.
So, just open the device manager on the PC, scroll down to find the audio driver, right-click on it, and tap on the update driver option. As a result, the audio driver will be updated, and the Audacity will start in the stereo. In the majority of cases, the driver updates are automatically installed when the PC is connected to the internet.
However, if you have restricted the automatic updates, you will need to update the drivers manually. Lastly, when the driver is updated, you must reboot the computer before using Audacity again.
- Storage
There must be enough space for Audacity to record and run the audio tracks simultaneously. In case the computer does not have enough storage, the software won’t be able to record in stereo. It is suggested that you set the Audacity’s path to the local hard drive of your computer as it’s more efficient as compared to the external drives.
It is suggested to use the local disk C as it has the most space. However, if it’s filled up, you can choose other local disks as well. In addition to this, it is suggested that you delete the old Audacity Project files if you have finished working on them.
- Reinstall
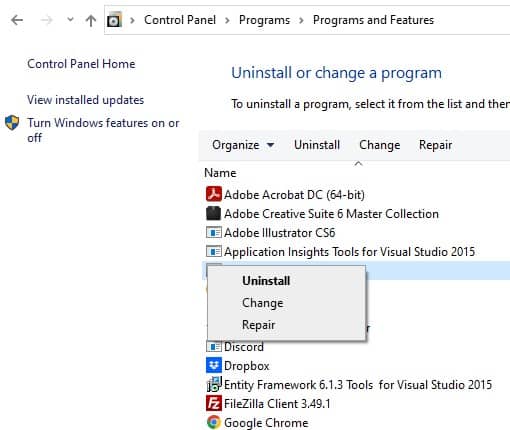
Deleting and reinstalling the Audacity software can help get rid of the bugs and corrupted files that are limiting the recording function. For this reason, it is suggested that you delete Audacity from the computer and install it again. You can delete the software from your computer with these steps;
- Open the control panel on your PC
- Open the programs tab
- Scroll down to Audacity
- Right-click on it and choose the uninstall button
In addition to the main software, you must delete the files as well. For this purpose, open the Users tab from the control panel, look for “appdataroamingaudacity” and delete the file that says, “audacity.cfg.” It will ensure that all the files are removed and won’t cause any file conflict when you reinstall the Audacity software.
For reinstallation, follow these steps;
- Open the web browser and type audacityteam.org/download
- On the right panel, choose the operating system, and the file will pop up
- Click on the download button
- Once the file is downloaded, click on it, and the installation will automatically start. There will be some on-screen prompts that you have to follow, but it will only take two minutes
- Check The Windows’ Settings
If the Audacity is still not recording in stereo, you must check the Windows settings, and the following steps can help;
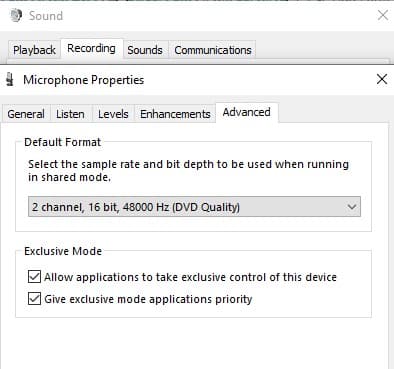
- Right-click on the speaker icon that’s right beside the system clock
- Choose the sounds option and move to the recording tab
- Choose the USB device from the list
- Tap on “properties”
- Tap on the advanced option and click on the default format option
- Now, select the 2 channel option for the bit rate and 16-bit rather than 32-bit for the sample rate and try recording
These settings will not only initiate the recording, but you will be able to export the recordings without any editing.
- Clear The Turntable
The majority of users connect their PC with the turntable. It’s a device that plays the records by spinning them at a consistent speed, which helps track the record’s grooves. However, it tends to create a signal conflict, which is why it must not be connected to the computer directly.
It must be passed through the receiver or pre-amplified with the phono input. It will ensure that equalization is on point and that the recording function is working properly.
Secondly, you must check the inputs on the turntables. This is because if either one of the inputs is damaged, it will not work. So, you must ensure that the turntables’ inputs are in optimal condition. Lastly, it is suggested to use the USB turntables as they work better.
- Check The Stereo’s Connection
It’s a common practice to plug the stereo equipment into the microphone port of the computer, but it is not the right connection and leads to recording issues. This is because the microphone port is designed for mono and low-level microphone input.
So, when connecting the stereo equipment, you should opt for the line-in port, and the recordings will work fine.
- Volume & Pan Controls
The pan controls help add a panning effect on the stereo files, and it tends to split the files. However, for the volume and pan controls to work properly, you must check the positioning of these controls.
In particular, the pan controls and track volume on the left side of the blue waves must be centered. Once these are centered, recording will likely initiate.
- Sound Connectors
The sound connectors play an essential role in recording the tracks in stereo. However, if the sound connectors are not properly connected to the PC, they won’t establish a connection, and the recording won’t start.
For this purpose, you must take out the sound connectors from the computer and make sure they are pushed all the way in. On the contrary, if it’s already connected securely, there are chances that it has internal damages or is dirty. So, take out the sound connector and use the alcohol wipe to clean it.
If cleaning it works, the recording will start. However, if the issue still persists, you must replace the sound connector with a new one.
- Check The Microphone
The users need a high-quality microphone to record audio with Audacity. This is because these microphones capture the audio signals and save them in the system. However, if you are using an incompatible microphone with Audacity, it will not be able to record.
So, it’s best to check Audacity’s website and check the list of compatible microphones. On the other hand, if you are already using a compatible microphone, it could be damaged. You can check its functionality with the ohmmeter.
So, connect the microphone to an ohmmeter, and if the reading shows “zero,’ you have to repair or replace the microphone.
- Call Customer Support
These are all the possible troubleshooting steps that you can follow to fix the recording issue. However, if the Audacity is still not recording in stereo, you can get in touch with their team through their Discord to get some help.
In the majority of cases, it’s because the server is down or there is a technical upgrade going on, which is usually fixed within a few hours.


