Today, Musescore is one of the most popular scorewriters around the world, and one of the most stable and trustworthy free and open-source music scoring software available.
One of the multiple options found in the software, is that a MIDI keyboard can also be used to input pitches. For the official instructions on how to set up your MIDI keyboard to insert pitches in Musescore, check the 7 steps of the Musescore handbook here.
However, it is a rather common issue for many users to experience some trouble when trying to use their MIDI keyboards in Musescore, with the input option not working properly for various reasons.
We have put together a list of solutions for issues while using MIDI input in Musescore, which are proven to work.
Musescore Midi Input Not Working
1. Configure Channels
First, check and make sure that you have 64-bit drivers installed (unless you’re not on a 64-bit system), that your keyboard is connected and turned on before starting MuseScore, and that your device is chosen in Edit / Preferences / I/O.
MuseScore is most likely already configured to function with your MIDI keyboard. If there are any issues, here is how to manually set up a connection:
- Connect the MIDI keyboard to your computer and turn it on.
- Launch MuseScore.
- Choose the MIDI keyboard from the MuseScorePreferences…I/O window menu.
- One possibility is to have the DAW and Musescore listen on different MIDI channels. Like:
DAW MIDI Channel 1
Musescore MIDI Channel 2 - Then, just change the MIDI channel on which your controller is broadcasting to “choose” which destination gets the input.
Assuming you can already make sounds using VSTs and successfully import MIDI notes into Musescore. You may choose the MIDI port and channel you wish to “listen on” for each track, all through the MIXER utility of Musescore.
So, for example, you may configure your Musescore track to listen on Port 1 (unless you have more than one MIDI Input device), and then set the Channel to 2. (this defaults to 1 as well).
Musescore will not respond if you play your Launchkey (which is most likely still outputting to Channel 1).
So you’d need to inform your LaunchKey which MIDI Channel to use. Refer to the manufacturer’s handbook for your MIDI controller and adjust the Mapping appropriately
Change it to, say, Channel 2, and Musescore should start receiving MIDI note data again. Change the Channel back to 1 when you want to return to Ableton.
2. Reset to Factory settings
MuseScore allows you to return to the normal built-in presets, sometimes known as “factory settings.” If your settings are corrupted, this may be essential.
Any modifications you’ve made to the preferences, palettes, or window settings will be lost if you revert to factory defaults. This is not a usual practice; instead, check the forums to see if there is a solution to address your problem without resetting everything.
- Reset Using the menu
If MuseScore still starts, you may cancel it from within the program.
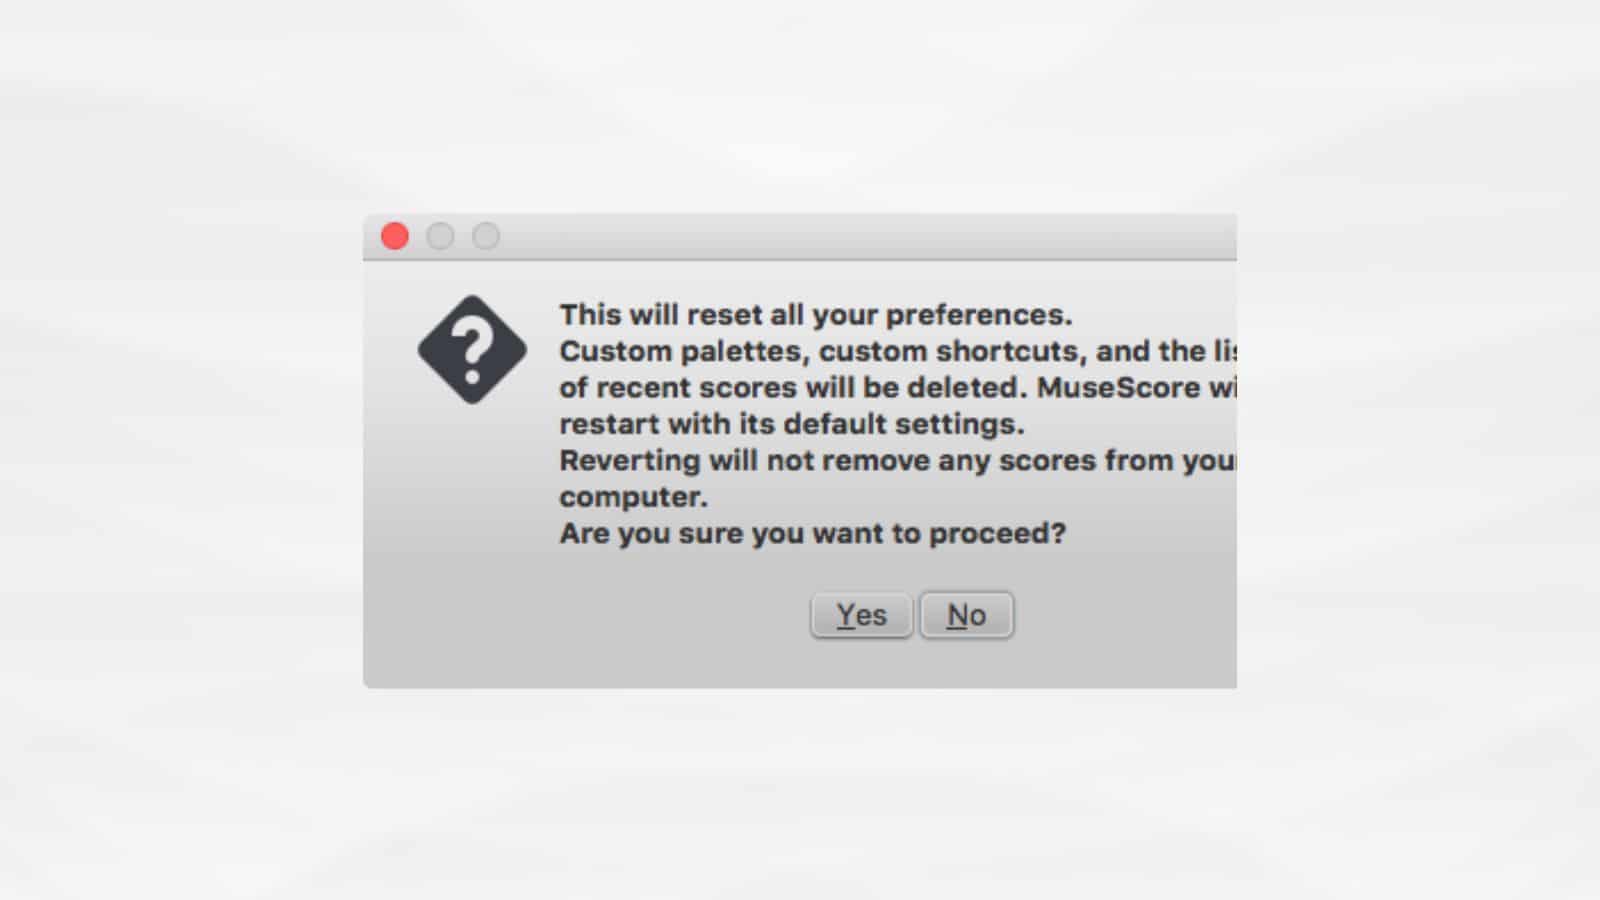
Go to Help and choose Revert to Factory Settings. A warning window will popup, with the following text: “This will reset all of your preferences. Custom palettes, shortcuts…”
Clicking Yes restores all MuseScore settings to their original state, and MuseScore will resume instantly. The reversion will be securely cancelled if you say no.
- Reset Using the command line
If MuseScore does not start, you must execute this command from the command line.
Windows instructions
-
- If you have MuseScore open, you must first shut it (FileQuit).
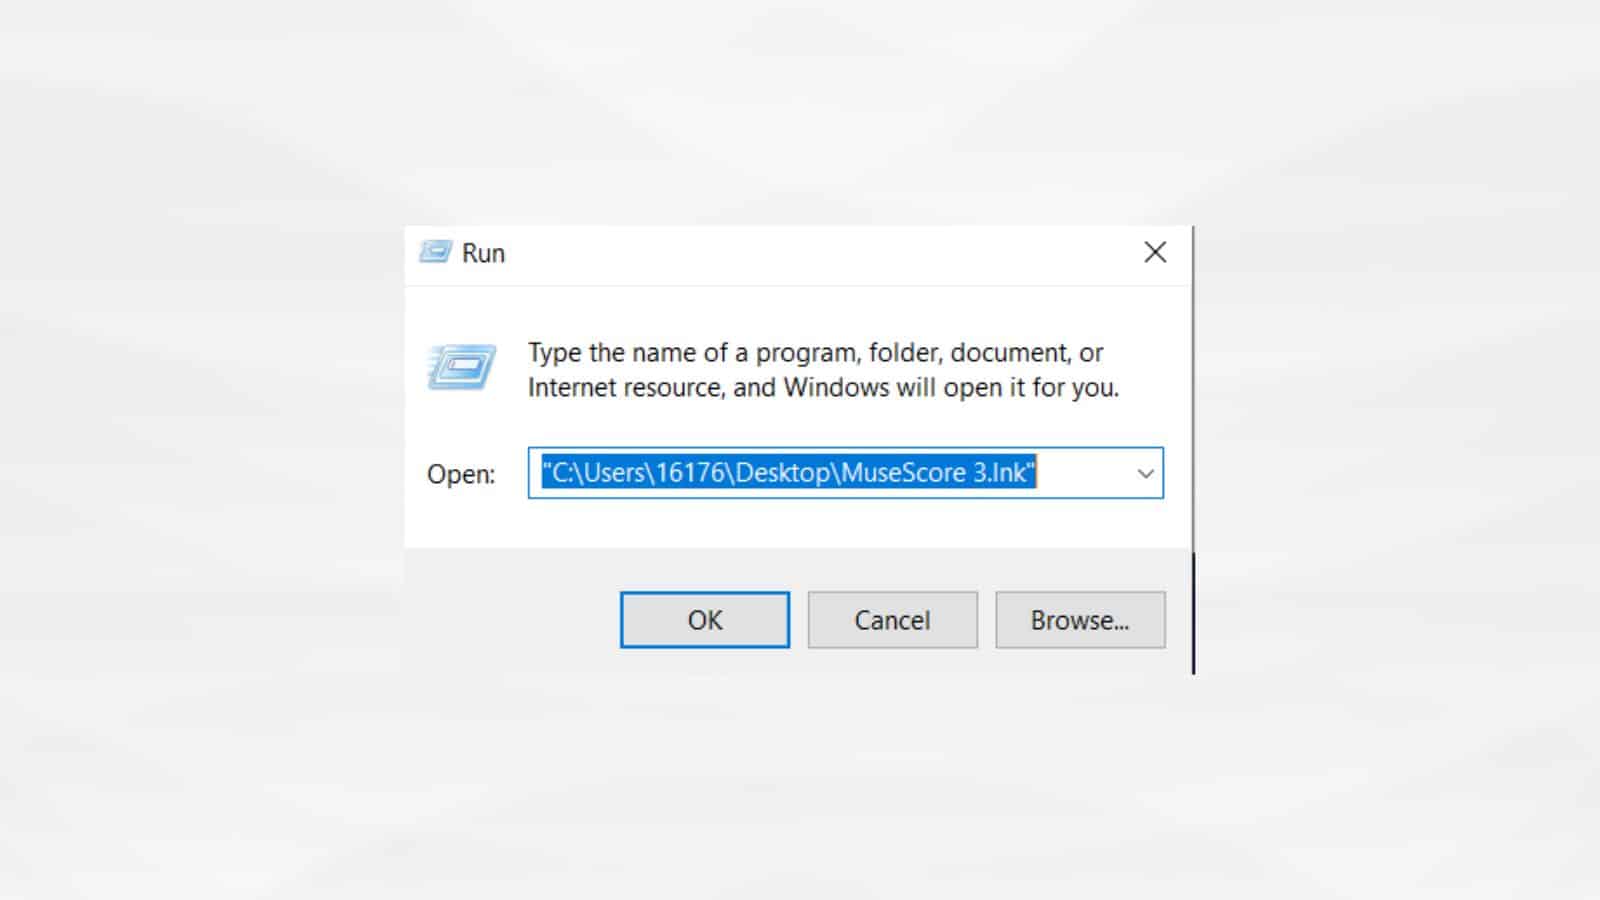
- To launch the Run dialog, press Win+R. Alternatively, click “Start” and type “run,” then click the “Run” program.
- Select Browse…
- Search your PC for MuseScore3.exe. The location may differ depending on your installation, but it is most likely something like My Computer Local Disk Program Files MuseScore 3 bin MuseScore3.exe.
To exit the Browse window and return to the Run dialog, click Open. In the Run dialog, the following text (or something similar) should appear.C:Program FilesMuseScore 3binMuseScore3.exe (in reality, %ProgramFiles%MuseScore 3binMuseScore3.exe)0 - The location for the 32-bit version of MuseScore in a 64-bit version of Windows isC:Program Files (x86)MuseScore 3binMuseScore3.exe (in reality, %ProgramFiles(x86)%MuseScore 3binMuseScore3.exe)
It is rather well concealed in the Windows Store version (Windows 10); look for it in Windows Explorer. - After the quote, add a space, then a hyphen, and a capital F: -F
- Click OK.
Within a few seconds, MuseScore will launch and all settings should be reset to “factory settings.”
The primary preference file for advanced users is accessible at:
C:Users[USERNAME]AppDataRoamingMuseScoreMuseScore3.ini (%APPDATA%MuseScoreMuseScore3.ini)
Other preferences (palettes, sessions, shortcuts, workspaces, etc.) have been added:
C:Users[USERNAME]AppDataLocalMuseScoreMuseScore3 (%LOCALAPPDATA%MuseScoreMuseScore3)
These are rather well disguised in the Windows Store version (Windows 10); look for them in Windows Explorer.
MacOS instructions
- If you have MuseScore open, you must first close it (MuseScoreQuit).
Open Terminal (through Spotlight search or in Applications/Utilities) and a session window should appear. - Enter the following command (including the ‘/’ at the beginning) into your terminal line:/Applications/MuseScore\ 3.app/Contents/MacOS/mscore -FThis restores all MuseScore options to factory defaults and opens the MuseScore program. It is important to note that you cannot exit the Terminal without also exiting MuseScore. You can safely exit MuseScore, exit the Terminal, and then reopen MuseScore as usual, ready to use.
- The primary MuseScore preference file is accessible at/Library/Preferences/org.musescore.MuseScore3.plist
for advanced users. Deleting this file frequently has no impact since macOS keeps a cached duplicate of the settings in an unknown location. The right approach to remove this file is to use the Terminal program and enter the following command:
org.musescore.MuseScore3 defaults delete
Other settings (palettes, sessions, shortcuts, workspaces, etc.) may be found in /Library/Application Support/MuseScore/MuseScore3/. (MacOS does not cache them.)
3. Driver options
Another easy solution to consider is a simple Driver option edit, which in many cases (like with older or outdated MIDI keyboards) might immediately solve the issue.
CoreMIDI IAC Driver options 1 and 2 are available in the MIDI Input window of that menu. When you connect in your keyboard, though, a third device emerges.
It’s “CoreMIDI, USB Midi Keyboard” for a USB-native keyboard, and something similar to”CoreMIDI, USB Midi”, depending on the MIDI keyboard you’re using.
Select this device, not an IAC driver, then hit APPLY and OK. Then quit and resume MuseScore. Whether this solution works relies on the MIDI keyboard you’re using.


