FL Studio is one of the best software for musicians who want to create multi-track music projects. This is because it is designed with plugin compatibility and advanced features, such as beat slicing, audio time-stretching, audio editing, pitch scaling, and audio chopping
However, there are a few errors that can hinder your music creation experience. One of these errors is the insufficient number of output channels, but it can be easily resolved. Here are a few fixes.
“Not Enough ASIO Output Channels Available At Least 2 Are Needed”
1. Check Output Devices
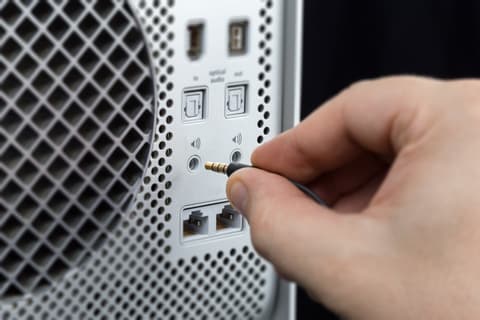
First of all, you must check the output devices, particularly the devices that are connected to the computer. Usually, people don’t connect enough output devices to the PC, which results in this error.
The solution is to connect the audio devices to the PC that you are using for using FL Studio, such as speakers and headphones.
When you connect the output devices, reboot the software, and it will start working without any errors. In addition, make sure that the output devices are tightly plugged in.
2. Restart FL Studio
In various cases, FL Studio is not able to detect the connected output devices during the initial setup process. For this reason, you should restart the software to make sure it detects the output devices that are connected to the PC.
However, while restarting the software, make sure that you exit the software rather than minimize it.
3. Review Access Permissions
The users need to be vigilant about the audio output permissions. This is because if FL Studio doesn’t have permission to detect output devices, it simply won’t recognize any connected devices.
So, open your settings and check the audio permissions from the control panel. Make sure FL Studio has all necessary permissions, then save and quit. You might have to restart FL Studio for the changes to take effect.
4. Check Audio Drivers
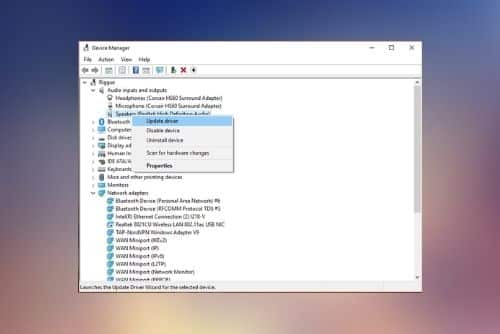
The PC’s audio drivers must be updated to the latest version for FL Studio to detect the output devices. Generally, the drivers are updated automatically as soon as a new update is released. However, to update the drivers manually, follow these instructions:
- Open the Device Manager on your PC
- Choose the audio driver category and right-click on it
- Choose the search automatically option
- Once the search is complete, the available updates will be listed down
- Tap on the update driver option and wait for a few minutes to complete the process
Updating the drivers will also install the missing files to make sure the drivers operate properly. Keep in mind that drivers with missing files can also make the drivers corrupt. So, it is better that you manually check the driver updates regularly and install them.
Most newer operating systems like Windows 11 regularly run updates automatically, so if you’re using Windows 10 or 11, this generally won’t be an issue.
5. Clear Other Programs
If you are using multiple audio editing software at a time, there are chances that they are interfering with each other. In simpler words, if the soundcard is being used by other audio programs, it won’t work well with FL Studio.
For this reason, it’s best to clear the background programs, including the extra audio and video editing software.
6. ASIO Driver
An ASIO driver is important for connecting the soundcard and FL Studio software. However, if the driver is not working properly, the connectivity between software and soundcard will be hindered. To resolve the problem, you should delete the driver and reinstall it.
- Open the control panel on your system and open the programs tab
- Scroll down to the ASIO driver
- Tap on the uninstall button
Once you delete the driver, reboot your PC. When it switches on, you need to install the ASIO driver again.
For reinstallation, follow the below-mentioned instructions:
- Open the www.asio4all.org website
- Scroll down to the 2.14 English and click on it to start the download
- When the download is complete, double click on the .exe file, and follow the on-screen prompts
- Once the on-screen prompts are complete, click on the finish button, and the ASIO driver will be installed
7. Recheck The Output Device Connection
If you are using M-audio Fast Track with FL Studio, you need to check if the audio output is recognized or not.
- Open the control panel and open the hardware and sound tab
- Click on the sound option and open the playback tab. You will find the M-Audio with other devices
- Right-click on any other device except M-audio and enable it
- Then, disable M-audio by right-clicking on it
- Save the changes by pressing the OK button, and reopen the FL Studio. As a result, you will start seeing M-Audio in the sound settings, and the software will work without any errors
8. Use Playing Audio Troubleshooter
If you are using FL Studio on a Windows PC, you can use the Playing Audio Troubleshooter to resolve this error. To run this troubleshooter, follow the below-mentioned steps:
- Press the Windows and Q button
- Write down “Troubleshoot” in the search box, and a new page will open
- Click on troubleshoot, and the settings will appear
- Scroll down to “playing audio”
- Tap on “run the troubleshooter”
- A new window will open, and a list of troubleshooting tips will appear
- Follow these tips, and the error will go away
9. Sound Adapter
The sound adapter is a plug-in card that helps record the sound. These cards work as the input port for sound sources and as an output port for amps and speakers.
So, when the sound adapter stops working, FL Studio won’t be able to detect the devices, and reinstalling the sound adapter will fix the error.
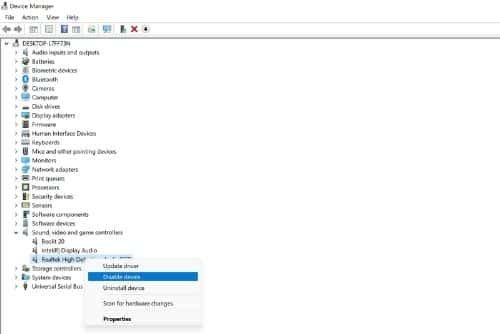
- Open the Device Manager
- Click on the sound, video, & game controller
- Right-click on the audio adapter and choose the “disable device” option
- Wait for a few minutes and right-click on it again to press the “enable device” option
These steps will enable the sound adapter, promising better performance for the FL studio.
10. Audio Services On Windows
The audio services manage different audio devices that are connected to Windows. So, when the audio services stop working, the audio devices and software won’t function correctly.
In addition, if audio services are disabled, every device and software depending on it will stop working, including the output devices and FL Studio. The only solution is to enable audio services.
For this purpose, you have to first open Run (it can be launched by pressing the Windows and R keys). On this tab, input “services.msc” and hit the OK button
Then, scroll down to the Windows Audio and double-click on it to select the “Automatic” option. After this, click “Apply,” and the audio services will be enabled.
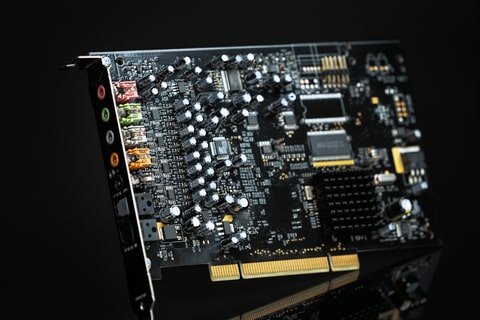
11. Sound Card
A sound card is another important component for the audio devices and software to work properly. However, with time, the soundcards wear down, resulting in a malfunction.
In addition, constant power fluctuations also damage the card. Having said that, you must inspect the soundcard and replace it if it appears worn out. Fortunately, replacing the sound card is convenient and affordable.
12. Reboot The PC
In some cases, FL Studio is unable to detect the output devices because of hardware configuration errors. These errors occur while loading the Windows. This is why it’s suggested to reboot the PC to make sure the configuration is done properly.
Also, while the Windows is rebooting, don’t attach or remove the devices. Ideally, you should connect the devices when the PC is switched off as it optimizes the configuration.
13. Update FL Studio
The last solution is to update FL Studio. This is because the older versions have various bugs that hinder the software’s functionality. So, update FL Studio to the 20.9 version, and it’s likely to resolve the error.
In addition to fixing the error, it will also add new effects, multiple selections for playlist tracks, video scrubbing, and a frequency shifter effect. In addition, when the FL Studio has been updated to the latest version, you must reboot the PC before using it to ensure the new files are fully installed.

